How to Connect
Google Ads
Publish paid Google Ads as Demand Gen, Performance Max, or Responsive Display from Campaigns or Social Ad preview, with spend and conversions synced back automatically.
Prerequisites
- A Google Ads customer account with a valid payment method at ads.google.com
- Admin access to that customer account (or via a manager account)
- A Get Shouting brand on a Pro or Agency plan with Paid Ad Settings visible
- Brand Admin role to connect or disconnect
- Google tags on your storefront if optimizing for conversions — Get Shouting does not install them. See Store conversion tracking
Billing: Google charges ad spend directly to your Google Ads payment profile — Get Shouting does not pay Google on your behalf. A processing fee on your authorized gross budget is charged to your Get Shouting subscription when you publish (unless you are on the Shouter plan).
Step-by-Step Connection
Step 1: Create or Access a Google Ads Account
- Sign in at Google Ads and create or open the customer account (10-digit ID, often shown as XXX-XXX-XXXX)
- Complete Billing & payments — add a payment method and confirm currency/country
- If you use a manager account (MCC), ensure the Google user you connect can access the child account you will publish into
All campaign spend is billed here by Google. Budgets you set in Get Shouting are sent to Google as campaign budgets; Google delivers ads and charges this payment method.
Step 2: Connect Google Ads in Get Shouting
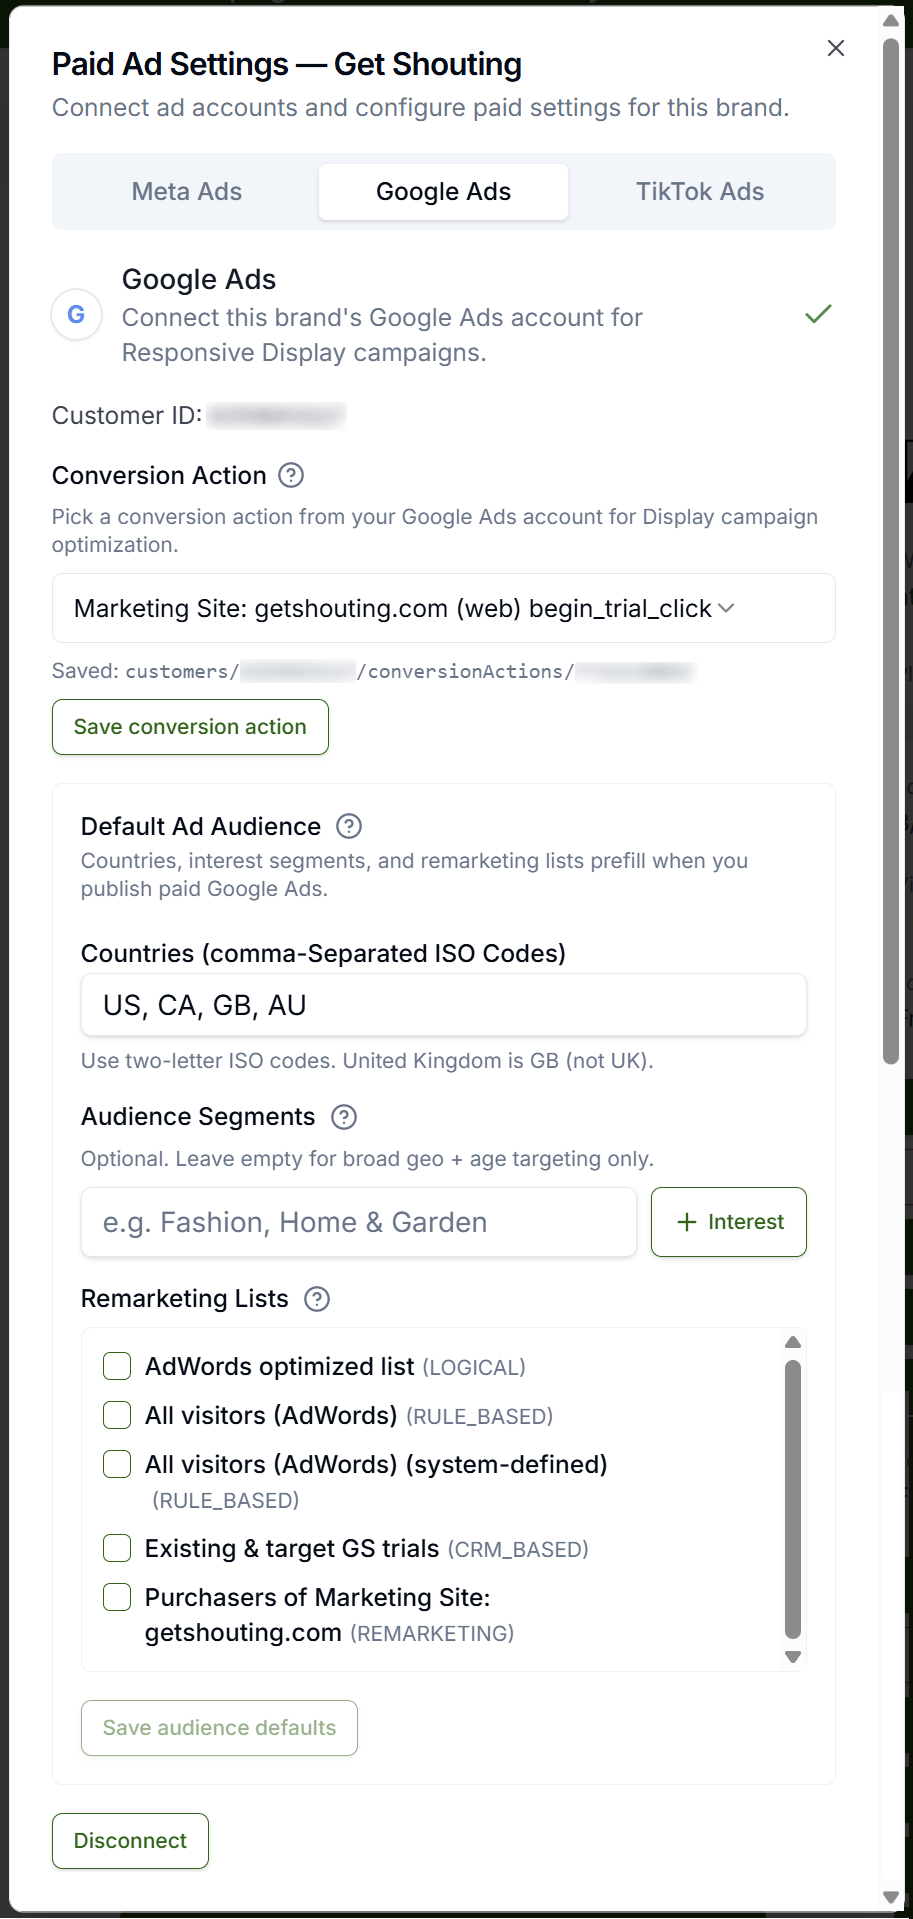
- Open Account → Social & Brand Settings for the brand (agency: use the brand card in the multi-brand grid)
- Scroll to Paid Ad Settings → Google Ads tab
- Click Connect Google Ads and complete the Google OAuth pop-up
- Under Select customer account, choose an account → click Save customer account
- Confirm the card shows Customer ID: with your saved ID
Agency admins: open Paid Ad Settings — {brand name} from each brand card in the multi-brand grid.
Step 3: Install Google Tags on Your Store (Shopify / WooCommerce)
Get Shouting does not add Google tag code to your website.
- Shopify: Use the official Google & YouTube app
- WooCommerce: Use Google for WooCommerce
Full checklist: Store conversion tracking (Shopify & WooCommerce)
Step 4: Publish from Get Shouting
- Multi-Channel Campaigns: Step 1 → Social Ads → check Publish to Google Ads (paid) → set Google gross ad spend → after Build, use Publish to Google on an approved item
- Ad Preview: Publish → Publish ad → under Select All That Apply, check Publish to Google Ads (paid) → Google ad setup → choose Demand Gen (recommended), Performance Max, or Responsive Display
- Published Google campaigns are created ENABLED for your selected flight dates
Google Campaign Types
| Type | Where ads show | You need | In Get Shouting |
|---|---|---|---|
| Demand Gen (recommended) | Display Network by default; optional YouTube, Discover, Gmail | Square logo (≥144×144, ≤150 KB); $5/day minimum net spend | Available (default) |
| Performance Max | Search, Display, YouTube, Discover, Gmail, Maps | Conversion tracking recommended | Available |
| Responsive Display | Google Display Network | Logo recommended; ~$1/day minimum | Available — Google is moving Display into Demand Gen |
Clean images: Google does not allow text, logos, or buttons baked into marketing images. Get Shouting sends Google your photo without the designed overlay; Google shows your headline, logo, and button in its own layout. Meta and TikTok still receive your full designed ad.
See also: Choose a Paid Campaign Type
Step 5: Verify the Connection
- The Paid Ad Settings card should show your saved Customer ID
- Publishing a paid build item to Google should create an ENABLED campaign in Google Ads for your flight dates
- Within about 24 hours of publish, Get Shouting’s insights sync should populate spend and performance on the campaign report
Troubleshooting
Google Ads tab missing
Brand must be Pro or Agency — upgrade plan or confirm Brand Admin role.
No accounts after OAuth
Google user must have access to at least one customer account.
No conversion data in Google Ads
Install store tags; see Store conversion tracking.
Demand Gen needs at least $5.00/day
Raise gross ad spend, shorten the flight, choose Responsive Display, or publish fewer paid items.
Square logo required for Demand Gen
Upload a square logo on the ad or in Brand Settings (≥144×144, ≤150 KB).
Next Steps
- Connect Meta Ads
- Connect TikTok Ads
- Store conversion tracking
- Create a Multi-Channel Campaign — publish paid ads to Google from Build
- Create an Ad
- Brand Settings
- Analyze — campaign spend and ROI
Turn Plans Into Paid Campaigns
Connect ad accounts once, then publish and track from Get Shouting
Start Your Free Trial TodayNo credit card required • 14-day free trial • Cancel anytime
Related Marketing Academy Lessons
Strategy and context for why these steps matter: