How to Connect
Meta Ads
Publish paid Facebook & Instagram campaigns straight from your multi-channel campaign plan, with spend and conversions synced back automatically.
Prerequisites
- A Meta Business Portfolio (formerly Business Manager) at business.facebook.com
- A Facebook Page for the brand (used as the ad’s promoted Page)
- A Meta ad account with a valid payment method on file in Ads Manager
- Admin or Advertiser access to that ad account in Business Settings
- A Get Shouting brand on a Pro or Agency plan with Paid Ad Settings visible
- Meta paid ads beta access (email allowlist) — required for the Meta Ads tab and Publish to Meta Ads (paid) during Meta App Review; contact support if Meta options are hidden
- Meta Pixel on your storefront if optimizing for Purchase — Get Shouting selects the pixel but does not install it. See Store conversion tracking
Billing: Meta charges ad spend directly to your ad account’s payment method — Get Shouting does not pay Meta on your behalf. A 3% processing fee on your authorized gross budget is charged to your Get Shouting subscription when you publish (unless you are on the Shouter plan).
Step-by-Step Connection
Step 1: Create or Claim a Business Portfolio
- Go to business.facebook.com and sign in with the Facebook account that should own the brand’s ads
- Create a Business Portfolio (or use an existing one)
- Add your brand’s Facebook Page under Accounts → Pages
- Create or add an Ad account under Accounts → Ad accounts
If you work with an agency, they may invite your Business Portfolio as a partner — you still need Page and ad account access for Get Shouting to publish.
Step 2: Add a Payment Method in Ads Manager
- Open Ads Manager
- Select the ad account you will connect to Get Shouting
- Go to Billing & payments (gear menu or account settings)
- Add a credit card or other accepted payment method and confirm billing country/currency
All campaign spend is billed here by Meta. Budgets you set in Get Shouting are sent to Meta as campaign/ad set budgets; Meta delivers ads and charges this payment method.
Step 3: Connect Meta in Get Shouting
- Open Account → Social & Brand Settings for the brand (agency: use the brand card in the multi-brand grid)
- Scroll to Paid Ad Settings → Meta Ads tab
- Click Connect Meta Ads and complete the OAuth pop-up
- Under Select ad account, choose an account → click Save ad account

Step 4: Choose Facebook Page, Pixel, Optimization, and Default Audience
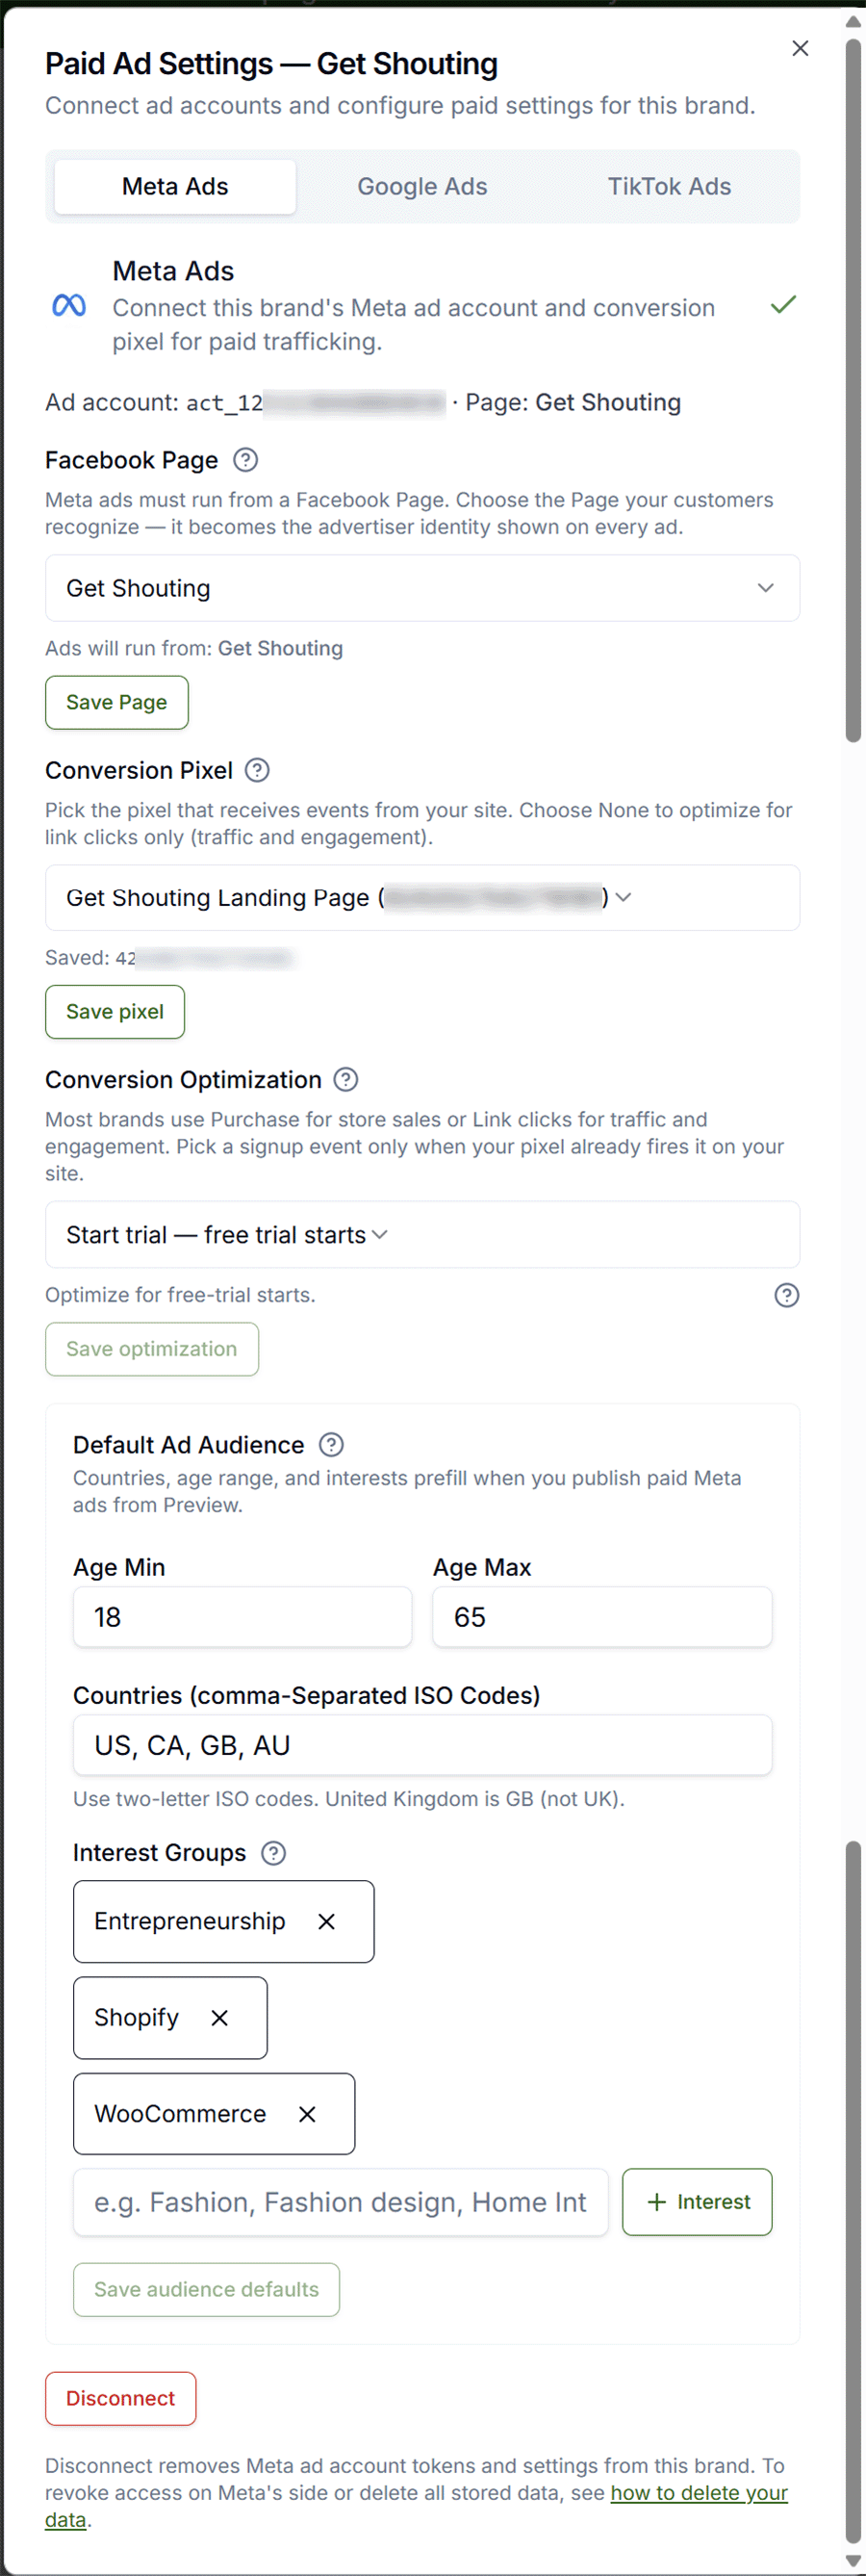
Facebook Page
Meta ads must run from a Facebook Page. Choose the Page your customers recognize — it becomes the advertiser identity shown on every ad.
- Under Facebook Page, pick the Page from the dropdown.
- Confirm Ads will run from: shows the correct Page name.
- Click Save Page.
Conversion Pixel
Pick the pixel that receives events from your site. Choose None (link clicks only — traffic and engagement) if you are not optimizing for on-site conversions.
- Under Conversion pixel, select a pixel from the dropdown (or None).
- Click Save pixel.
The pixel you select must be the same one receiving events on your Shopify or WooCommerce store — see Step 5 below. Get Shouting lists pixels from your ad account but does not install Meta Pixel on your storefront.
Conversion Optimization
Most brands use Purchase for store sales or optimize for link clicks when no pixel is selected. Pick a signup or trial event only when your pixel already fires that event on your site.
- Under Conversion optimization, choose the event Meta should optimize toward.
- Click Save optimization.
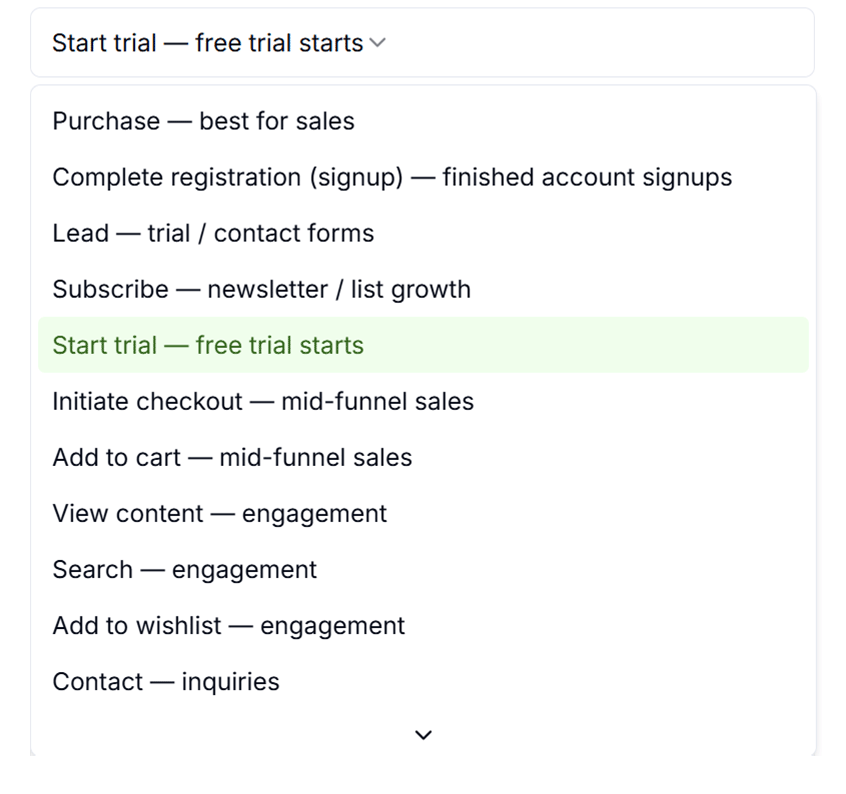
Available events include:
- Purchase — best for sales
- Complete registration (signup) — finished account signups
- Lead — trial / contact forms
- Subscribe — newsletter / list growth
- Start trial — free trial starts
- Initiate checkout / Add to cart — mid-funnel sales
- View content, Search, Add to wishlist, Contact — engagement
Default Ad Audience
Optional defaults pre-fill targeting when you publish ads from Preview or campaign review. You can still adjust targeting per publish.
- Age Min / Age Max — e.g. 18 and 65
- Countries — comma-separated two-letter ISO codes (e.g.
US, CA, GB, AU; use GB for United Kingdom) - Interest groups — add interests (e.g. Entrepreneurship, Shopify, WooCommerce) with + Interest
Click Save audience defaults when finished.
Get Shouting stores Meta ad settings per brand. Agency admins: open Paid Ad Settings — {brand name} from each brand card in the multi-brand grid.
Step 5: Install Meta Pixel on Your Store (Shopify / WooCommerce)
Get Shouting does not add Meta Pixel code to your website.
- Shopify: Sales channels → Facebook & Instagram → Share data settings — Shopify Help
- WooCommerce: Marketing → Facebook (Meta for WooCommerce plugin) — WooCommerce doc
Full checklist: Store conversion tracking (Shopify & WooCommerce)
Step 6: Verify the Connection
- The Paid Ad Settings card should show the selected ad account name/ID
- Publishing a campaign paid build item to Meta should create a paused campaign in Ads Manager (review before activating)
- Within about 24 hours of publish, Get Shouting’s insights sync should populate spend, impressions, clicks, and purchase metrics on the campaign report
Use the Ads Manager link stored on the build item or export job result to open the campaign in Meta after publish.
Meta App Review (Production)
For non-tester users to publish ads, the Get Shouting Meta app must be:
- Live (not Development-only) in the Meta Developer dashboard
- Approved for Advanced Access on
ads_management,ads_read, andbusiness_management
Until then, only Facebook accounts with Developer/Tester roles on the app can create ads. If publish fails with a development-mode message, complete App Review or ask to be added as a tester.
Troubleshooting
Connect button disabled or OAuth fails
Confirm Meta App Review / Advanced Access is complete for this deployment, then retry.
"No Facebook Page available" on publish
Link a Page to the ad account in Business Settings, then retry.
Publish succeeds but no spend shows in the report
Give the sync up to 24 hours; confirm the Meta connection token has not expired.
"App is in development mode" on publish
Switch to a Live Meta app after App Review, or use a tester account while on staging.
Minimum budget error
Gross spend must cover Meta’s minimum per ad set after the 3% fee, rounded to the nearest $10 — increase budget or use a single ad set.
Ads not delivering
Campaigns publish paused by design — activate them in Ads Manager after you review targeting and budget.
Wrong ad account connected
Re-open Paid Ad Settings and pick the correct account.
Disconnecting Meta Ads
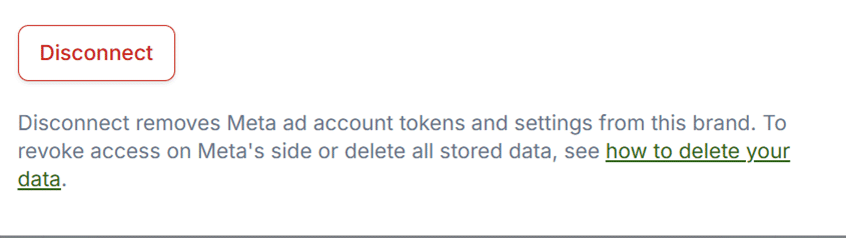
In Paid Ad Settings → Meta Ads, click Disconnect to remove Meta ad account tokens and settings from this brand. To revoke access on Meta’s side or delete all stored data, see how to delete your data.
Next Steps
- Connect Google Ads
- Store conversion tracking
- Create an Orchestration Campaign — publish paid ads to Meta from Build
- Create an Ad Shout
- Brand Settings
- Analyze — campaign spend and ROI
Turn Plans Into Paid Campaigns
Connect Meta Ads once, then publish and track spend from every campaign
Start Your Free Trial TodayNo credit card required • 14-day free trial • Cancel anytime