How to Create & Manage Segments
Target the right contacts for every campaign using dynamic, filter-based audience groups that update automatically.
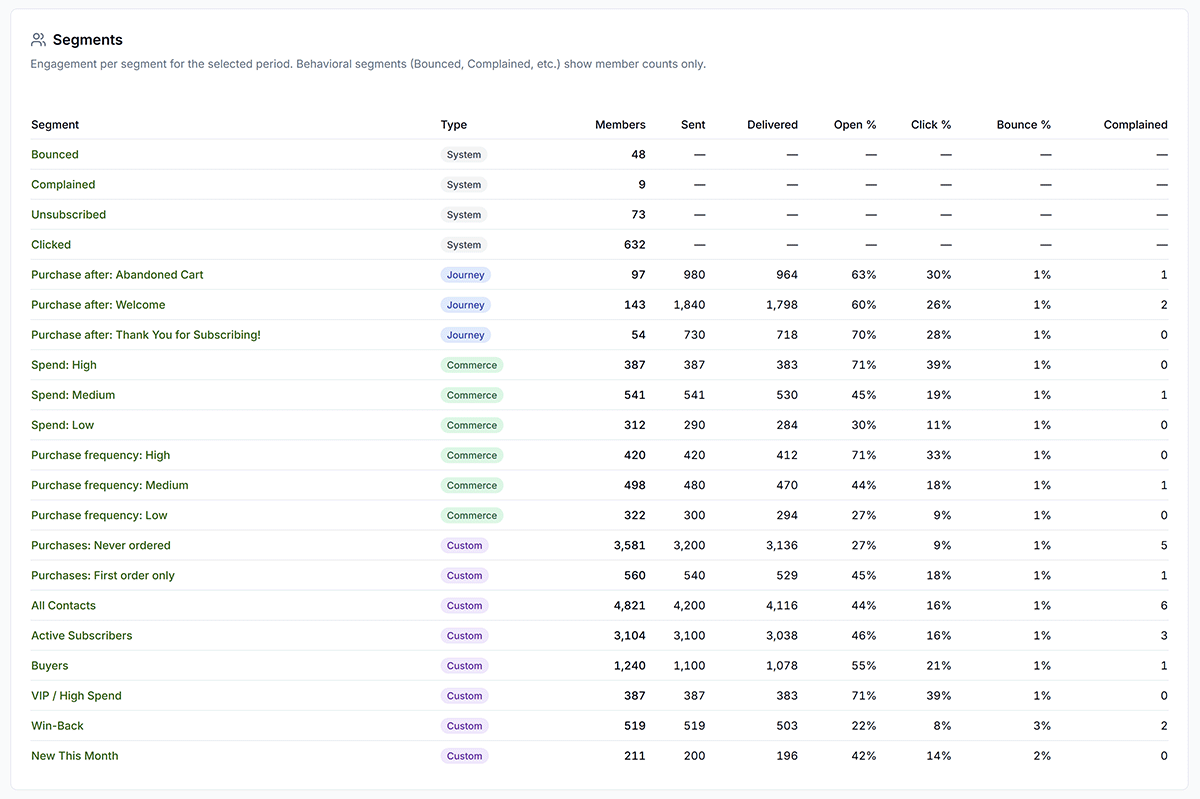
Segments reflect live contact data so recipient counts stay accurate for each send.
Lists vs. Segments
Lists are static collections of Contacts — membership doesn’t change unless you manually add or remove contacts. The Subscribers list is created automatically when the first contact subscribes via a public form, and All Contacts is created on the first contact import.
Segments are dynamic, filter-based groups. Membership updates automatically as contact behavior and data change — for example, a contact moves into the Clicked segment the moment they click a link in an email.
Auto-Created Segments
These segments are created and managed automatically. You do not need to create them.
Email Health Segments
- Bounced — contacts whose emails have bounced
- Complained — contacts who marked an email as spam
- Unsubscribed — contacts who opted out
- Clicked — contacts who have clicked a link in any email
Commerce Segments (Connected Stores Only)
If your store is connected with Email CRM enabled, these 7 segments are created from your order data. Boundaries are recalculated dynamically from actual order data.
- Spend: High / Medium / Low — based on total spend tertiles
- Purchase frequency: High / Medium / Low — based on order count tertiles
- Purchases: First order only — contacts with exactly one order
Journey Purchase Segments
Each CRM Journey automatically creates a Purchase after: [journey name] segment that tracks contacts who made a purchase after being enrolled in that journey.
Custom Segments
Creating, editing, or deleting custom segments requires a Pro or Agency plan. Basic plan users can view Auto-Created Segments and use them when building Campaigns, but cannot create custom Segments.
Custom Segments are defined using filter rules. Common filter options include:
- Contact status — active, bounced, complained, unsubscribed
- Tags — contacts must have all listed tags to qualify
- Date added — created before or after a specific date
- Commerce behavior — has ordered before/after a date, or within a spend range
How to Create a Custom Segment
Pro & Agency plans can create, edit, and delete custom email segments (and custom SMS segments where SMS is enabled).
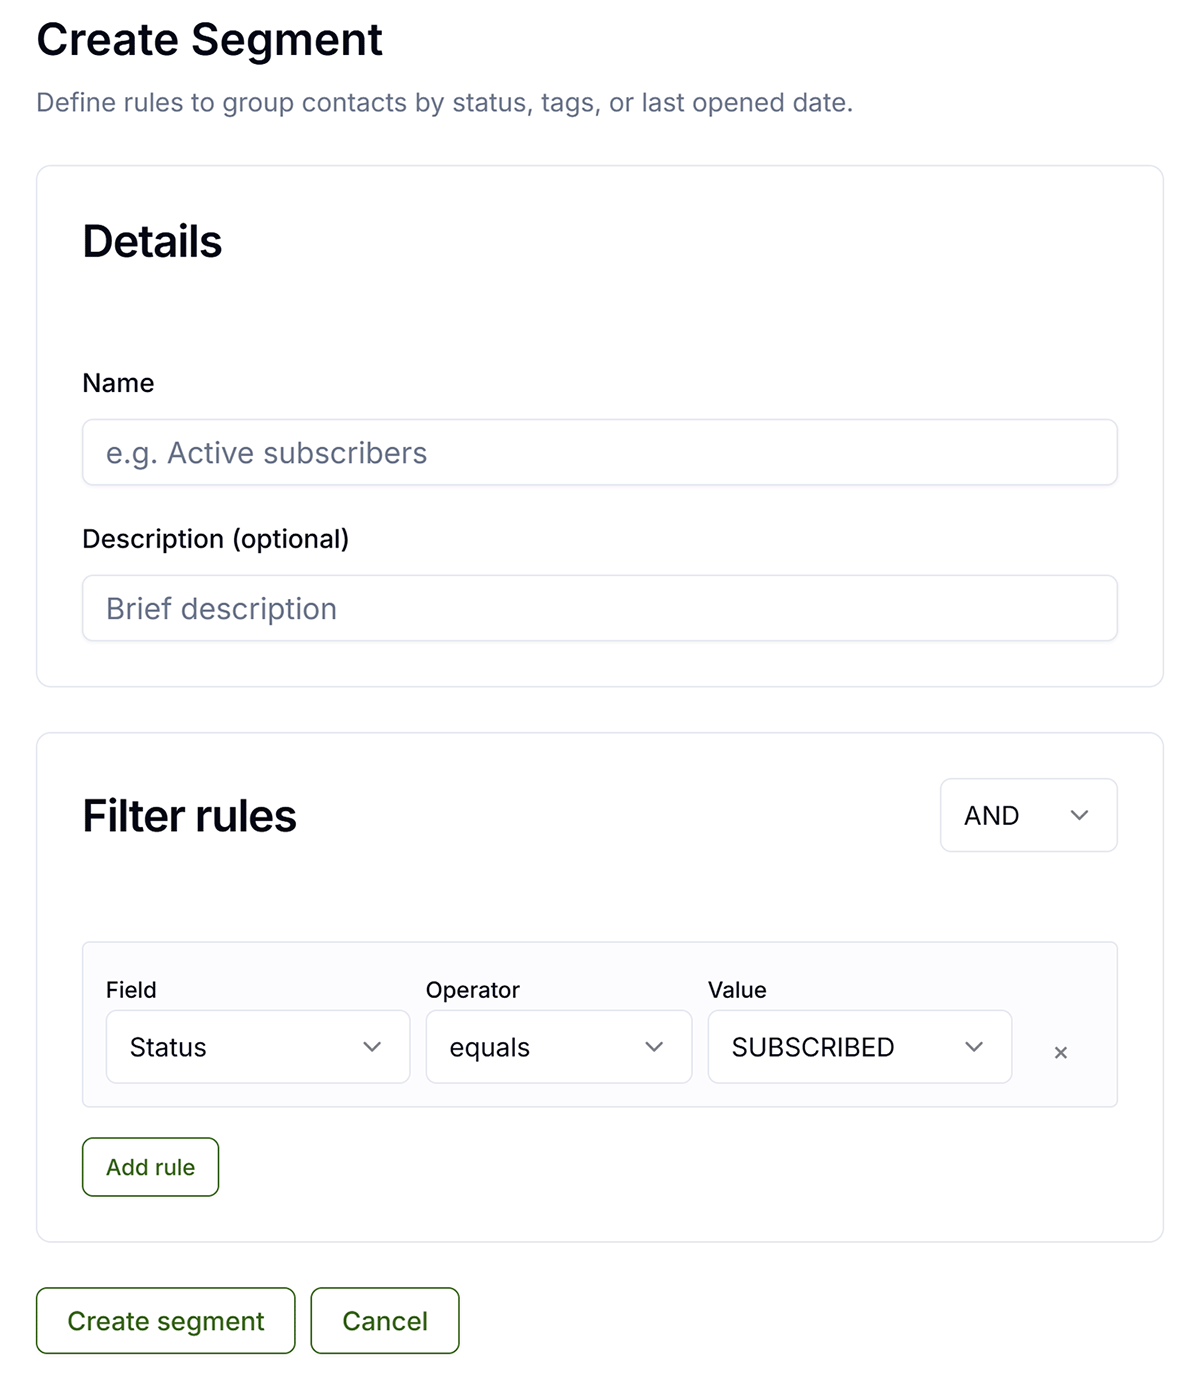
- In the app, go to Contacts → Segments.
- Click Create Segment (or New Segment), then choose Email Segment or SMS Segment.
- Enter a name and optional description so your team can recognize the audience later.
- Add filter rules — for example contact status, tags contacts must all have, date added, or email engagement such as last opened. Chain conditions with AND or OR to match the exact group you want.
- Save. The segment appears in the grid and in the Recipients step when you build or edit an email campaign.
Using Segments in Campaigns
When creating or editing an email campaign, select a segment as the recipient audience. You can combine a list and a segment — the union of contacts is used, automatically deduplicated.
Contacts in the Bounced or Complained segments are always excluded from sends, regardless of which list or segment you choose.
Monitoring Segment Health
- If your Bounced segment grows above 5% of total contacts, your list quality needs attention — stop importing unverified addresses.
- The Clicked segment is your most engaged audience and is ideal for re-engagement campaigns.
- The Spend: High segment is perfect for exclusive offers and loyalty rewards.
- Tags added through journey Add Tag steps build behavioral audiences over time — use these to create targeted custom segments.
Next Steps
Related Marketing Academy Lessons
Strategy and context for why these steps matter: