Brand Settings
Configure brand identity, social media connections, connect your store, set up Email DNS and SMS sender, and customize AI prompts. (Social & Brand Settings tab)
The Social & Brand Settings tab controls your brand identity, social media connections, e-commerce store connection, Email CRM sender and DNS, SMS sender, and AI prompt customization. Required: Admin or Super Admin. Plans: All plans (Email & SMS require the Email CRM plan).
Accessing Brand Settings

- Log in to Get Shouting
- Click on your Display Name in the far right of the navigation bar
- If your role is Admin or Super Admin, you will see the Social & Brand Settings tab
New account users are automatically Super Admin
Your tab view will be different depending on your plan and role.
Super Admin users on the Basic plan will see something like this:
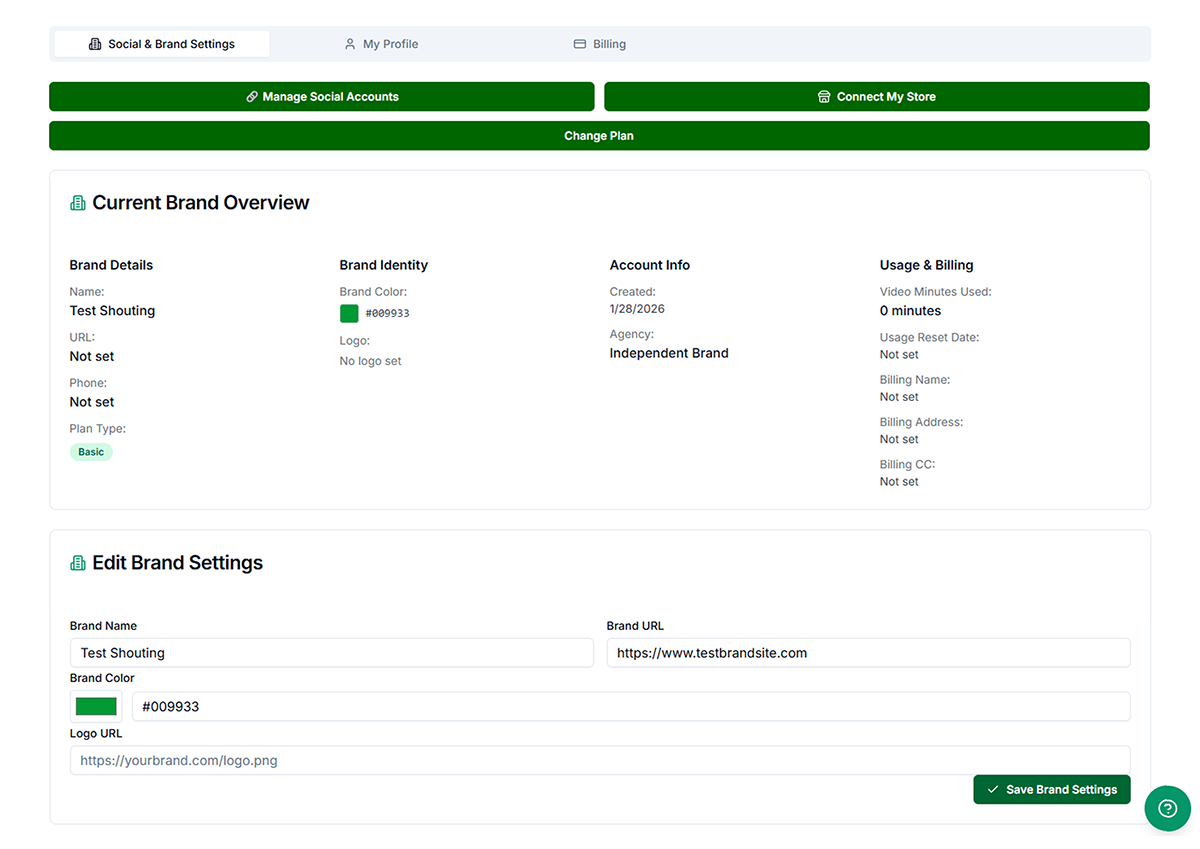
Super Admin users on an Agency plan will see something like this:
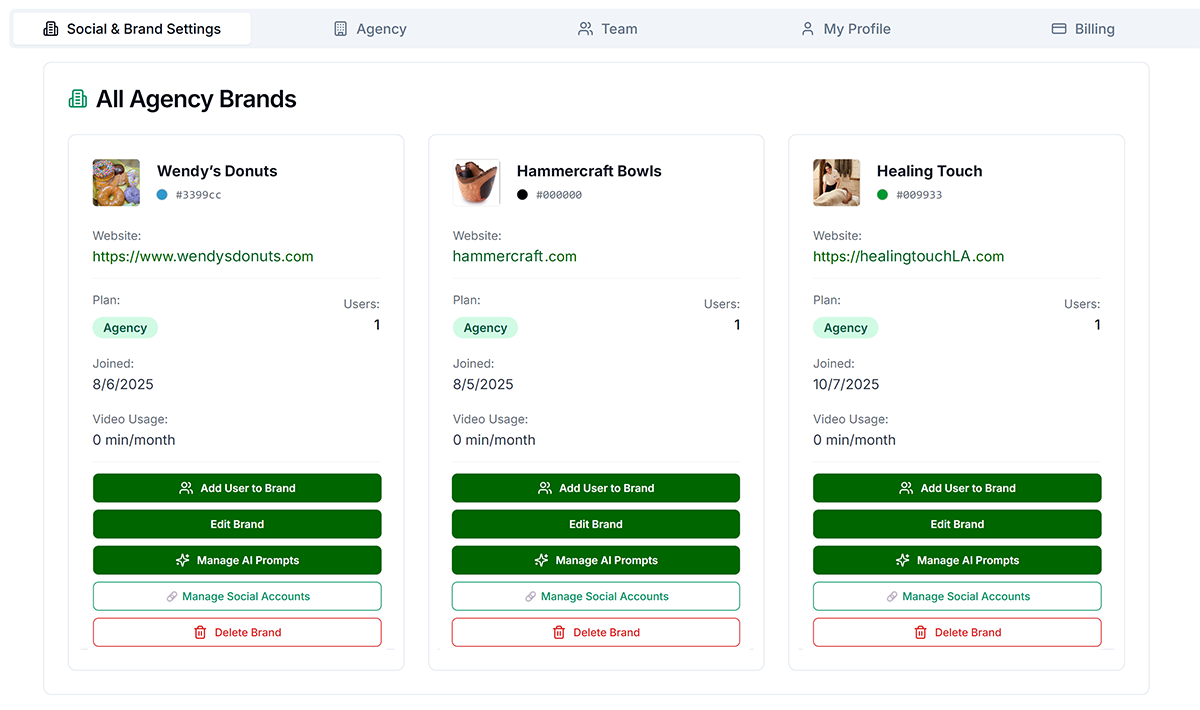
Brand Information
Brand information is used when generating posts and ads. On Agency plans, all brand information is fully isolated per brand — Shouts, Ads, Inbox , Analytics, Asset Library, and AI prompts are separate for each brand.
- Brand Name — Max 100 characters. Used in posts and AI-generated copy.
- Website URL — Your brand's website. Must include
https://orhttp://. - Brand Color — Your brand's main color as a hex code (e.g.
#000000). Use the color picker or type a hex value. - Brand Logo — Upload via the logo picker (recommended 1500×1500px). This is not a URL text field.
- Default brand font — Choose the default typeface for paid ad rendering from bundled fonts and any uploaded brand fonts (Pro+). Separate from social post typography.
Brand Fonts
On Pro+ plans, the Brand Fonts card (below the edit form) lets Brand Admins upload custom .ttf files for paid ad rendering. Uploaded variants appear in the ad flatten pipeline after upload completes and become available in the default font dropdown. Custom brand fonts are separate from social post fonts.
Click Save Brand Settings to persist changes — fields do not auto-save.
Email Sending Settings
The Email Sending Settings section (visible when Email CRM is enabled) lets you configure your email sender identity for campaigns and journeys.
- From Name — Display name recipients see in their inbox
- Physical Address — Required by CAN-SPAM law (must be set before sending any campaigns)
- Reply-to Email — Optional; where replies to campaigns are sent
- Custom Domain — Configure a verified sending domain (e.g.
hello@yourbrand.com) and view DNS records
See Connect to Email DNS for full setup instructions.
SMS CRM Settings
(Only visible when SMS CRM is enabled and you have an Email CRM plan.) The SMS CRM Settings card lets Admins configure your SMS sender:
- Sender Name — Up to 11 characters, used as the “From” display name
- TCPA Compliance — Required acceptance of TCPA terms before a phone number is assigned
- Assigned phone number — Shown read-only after setup (toll-free number from pool)
- Opt-in page link — Shareable URL for collecting SMS opt-ins from contacts
See Connect to SMS for full setup instructions.
Social Media Connections
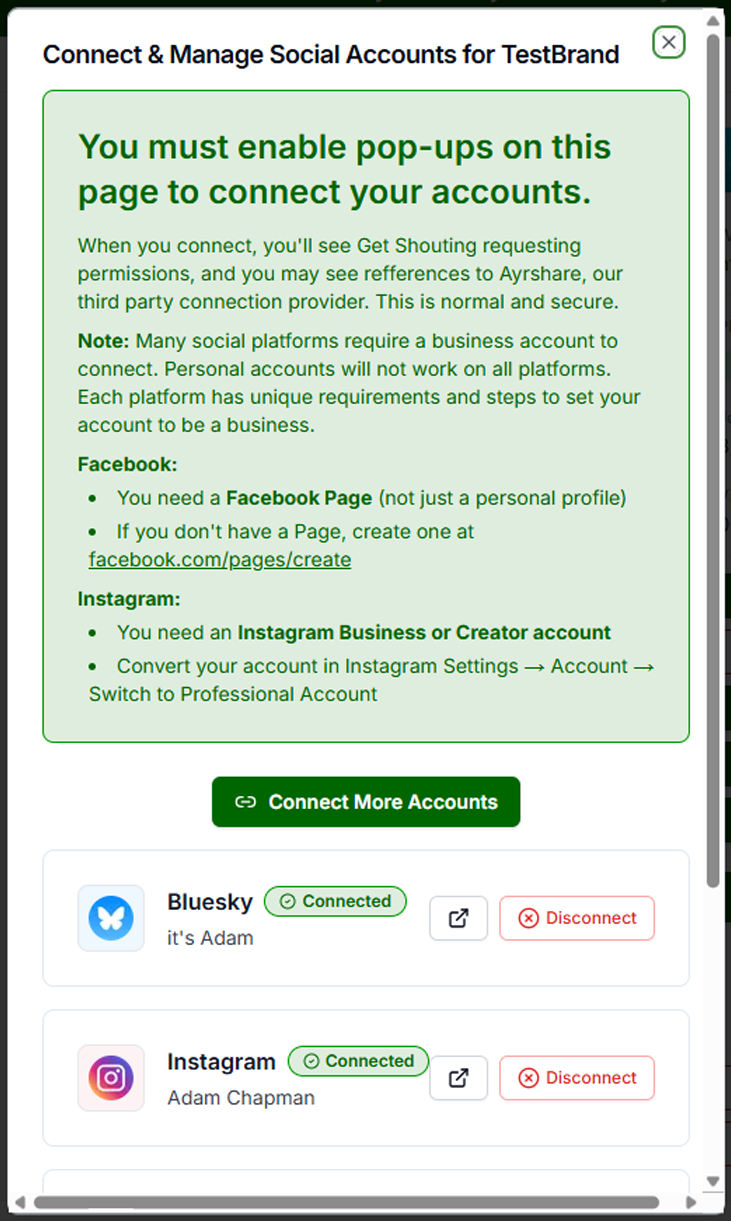
Connect via Ayrshare (OAuth) inside the Manage Social Accounts dialog. Supported platforms: Instagram, Facebook, TikTok, Pinterest, YouTube, Threads, Bluesky, X/Twitter, LinkedIn, and Google Business.
- On Social & Brand Settings, click Manage Social Accounts
- In the dialog, click Connect next to the platform
- Review the informational overlay. You must have pop-ups enabled to connect accounts.
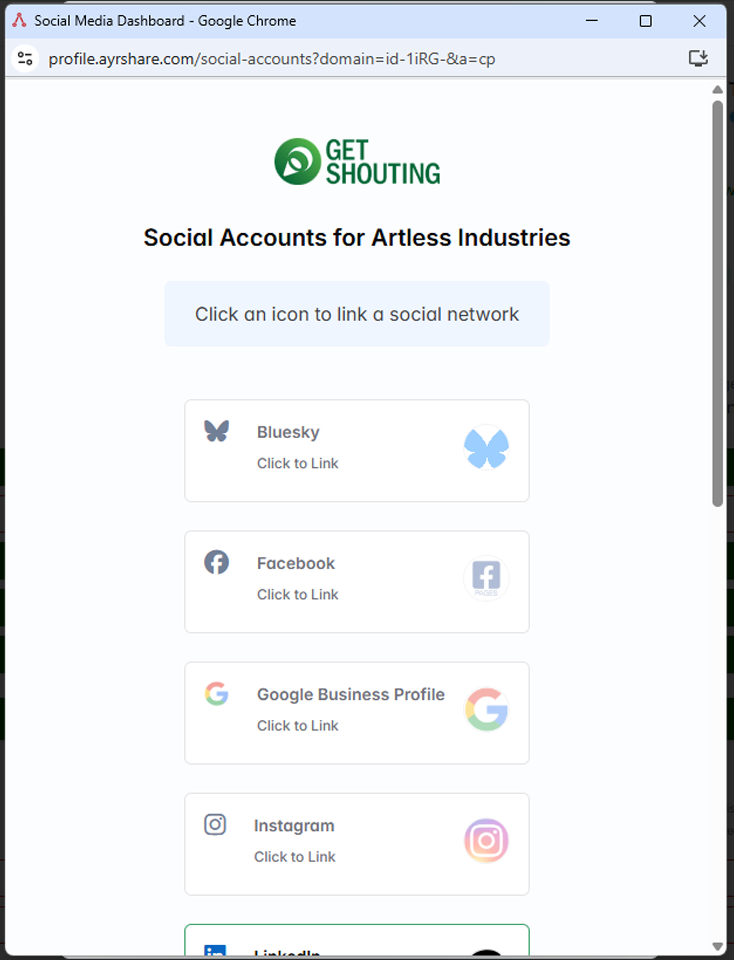
- Click Connect More Accounts to launch the authorization pop-up
- Log in to the social platform and authorize access
- Close the pop-up to return to the page
See How to Connect Social Accounts for detailed instructions.
Connect Store
Admins, Super Admins, Shouters, and Super Shouters can connect an e-commerce store from this tab.
- Click Connect Store (when no store is connected)
- Choose Shopify or WooCommerce in the dialog
Paid Ad Settings (Meta & Google)
Brand Admins on Pro+ plans can connect ad platforms to publish paid ads from Preview or orchestration campaigns. The card has two sub-tabs: Meta Ads and Google Ads. Paid publish UI may require beta access — contact support if tabs are hidden.
Meta Ads tab: Connect Meta Ads → Save ad account → Conversion pixel → Save pixel (or None (link clicks only — traffic and engagement)) → optional Save optimization and Save audience defaults.
Google Ads tab: Connect Google Ads → Save customer account. There is no Google tag UI in Get Shouting — install tags on your store separately.
Brand fonts: Upload custom fonts for paid ad rendering (separate from social post fonts). Variants appear in the ad flatten pipeline after upload completes.
Get Shouting lists Meta pixels from your ad account but does not install Meta Pixel or Google tags on Shopify/WooCommerce. See Connect Meta Ads, Connect Google Ads, and Store conversion tracking.
AI Prompts
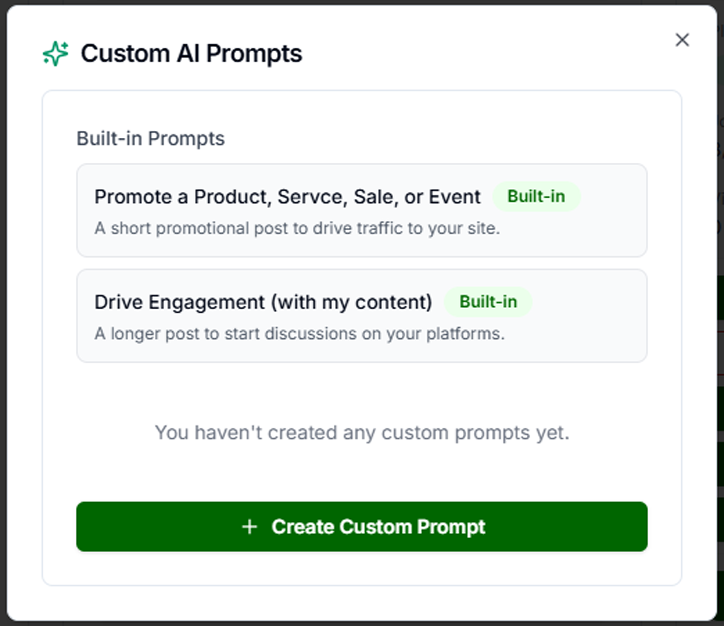
(Pro+ plans; agency multi-brand grid only.) Custom AI prompts define how Get Shouting generates content. On agency accounts, open Manage AI Prompts on a brand card in the agency grid. The default prompts (Promote and Drive Engagement) cannot be deleted.
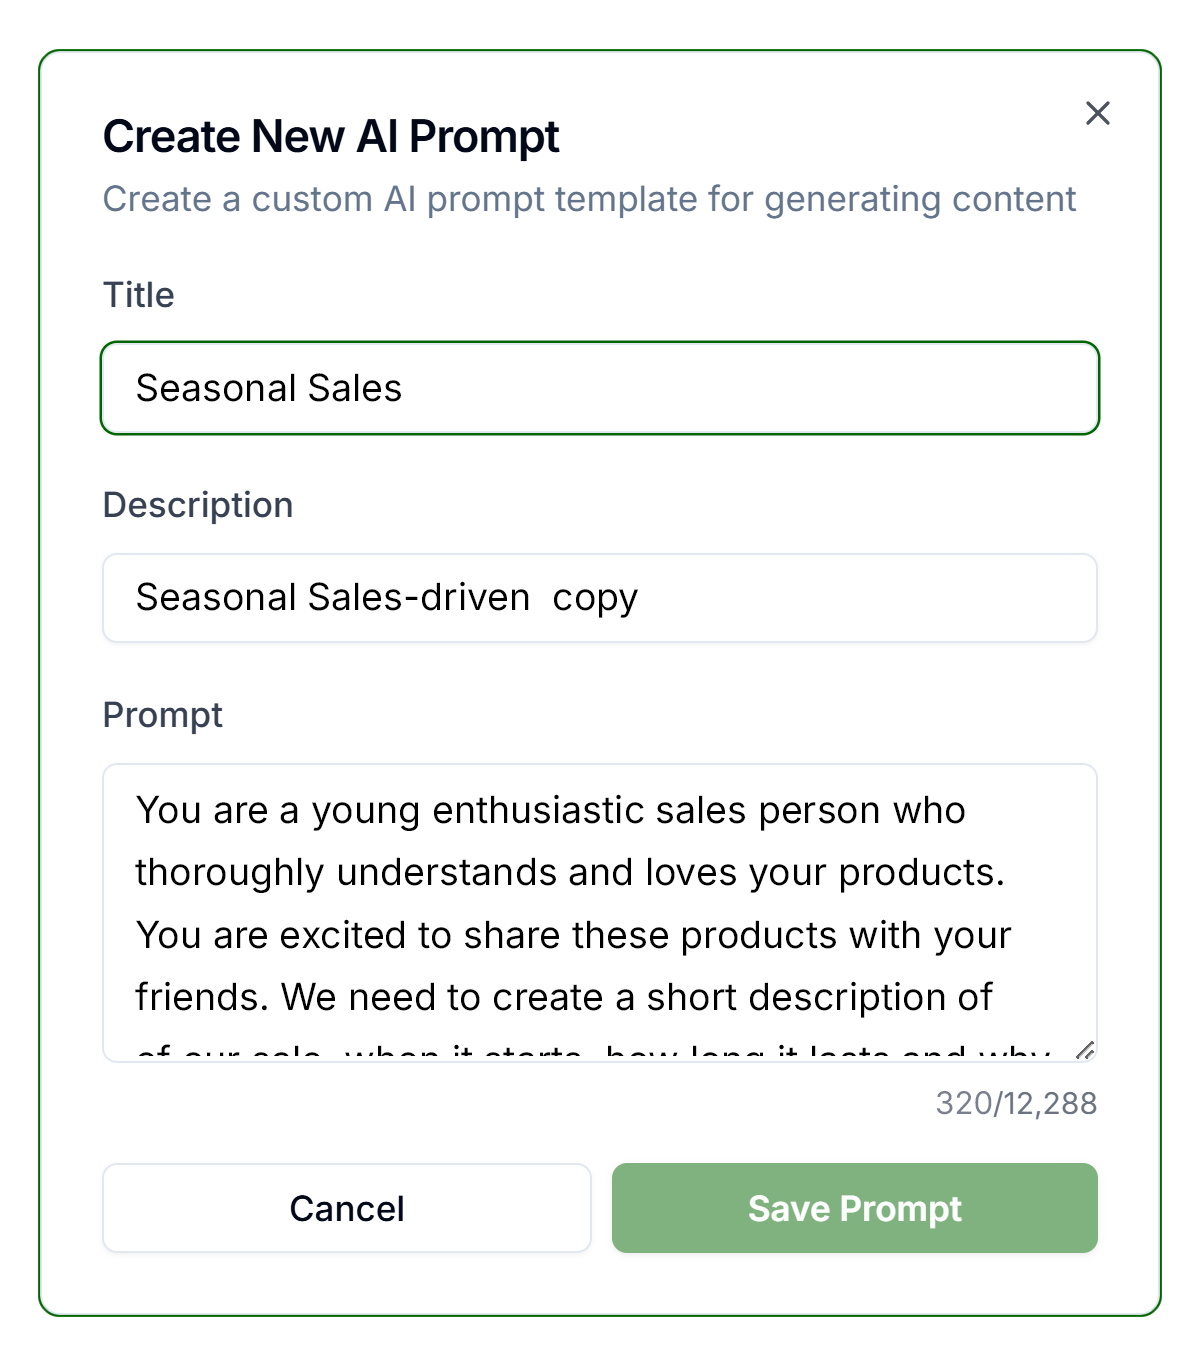
Adding a custom prompt
- On an agency brand card, click Manage AI Prompts
- Click + Add Prompt or Create Prompt
- Enter Prompt Name (internal label) and Prompt Text (instructions for the AI)
- Click Save
Custom prompts are available in Create → Social when generating from URL or Store — select your prompt in the generation modal. Click any existing custom prompt to edit or delete it.
Change Plan
- Change Plan — Click the Change Plan button to upgrade or downgrade your plan.
See the Billing tab section for detailed instructions.
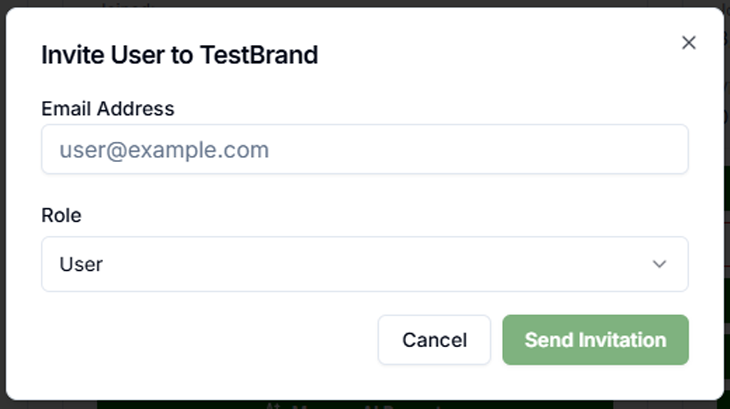
Add User to Brand
- Add User to Brand — This will launch an overlay that allows you to enter the e-mail of the person you want to invite to the given Brand.
Refer A Friend
- Refer a friend: Once they sign up with any annual/yearly plan, both of you will receive a free month!
- Click the button and enter your friend's email address. The code will automatically be mailed to them.
- Your friend will receive an email with a link to sign up. They will need to enter the code to redeem the free month.
- You will receive an email when your friend signs up and redeems the code.
- Your discount applies automatically to your next invoice
- You have a limited number of codes you can send out, so be sure to use them wisely.
- Referrals are also accessible in the Billing tab.
Troubleshooting
- Logo not showing: Re-upload via the logo picker; ensure the image uploaded successfully and you clicked Save Brand Settings.
- Social connection failed: Log into the platform first. Verify Admin permissions for Pages/Company Pages.
- Platform shows Connected but posts fail: Disconnect and reconnect. Authorization may have expired.