Meta Ads in Get Shouting
Facebook, Instagram, & Threads: conversion optimization, audience defaults, and when to pick each setting.
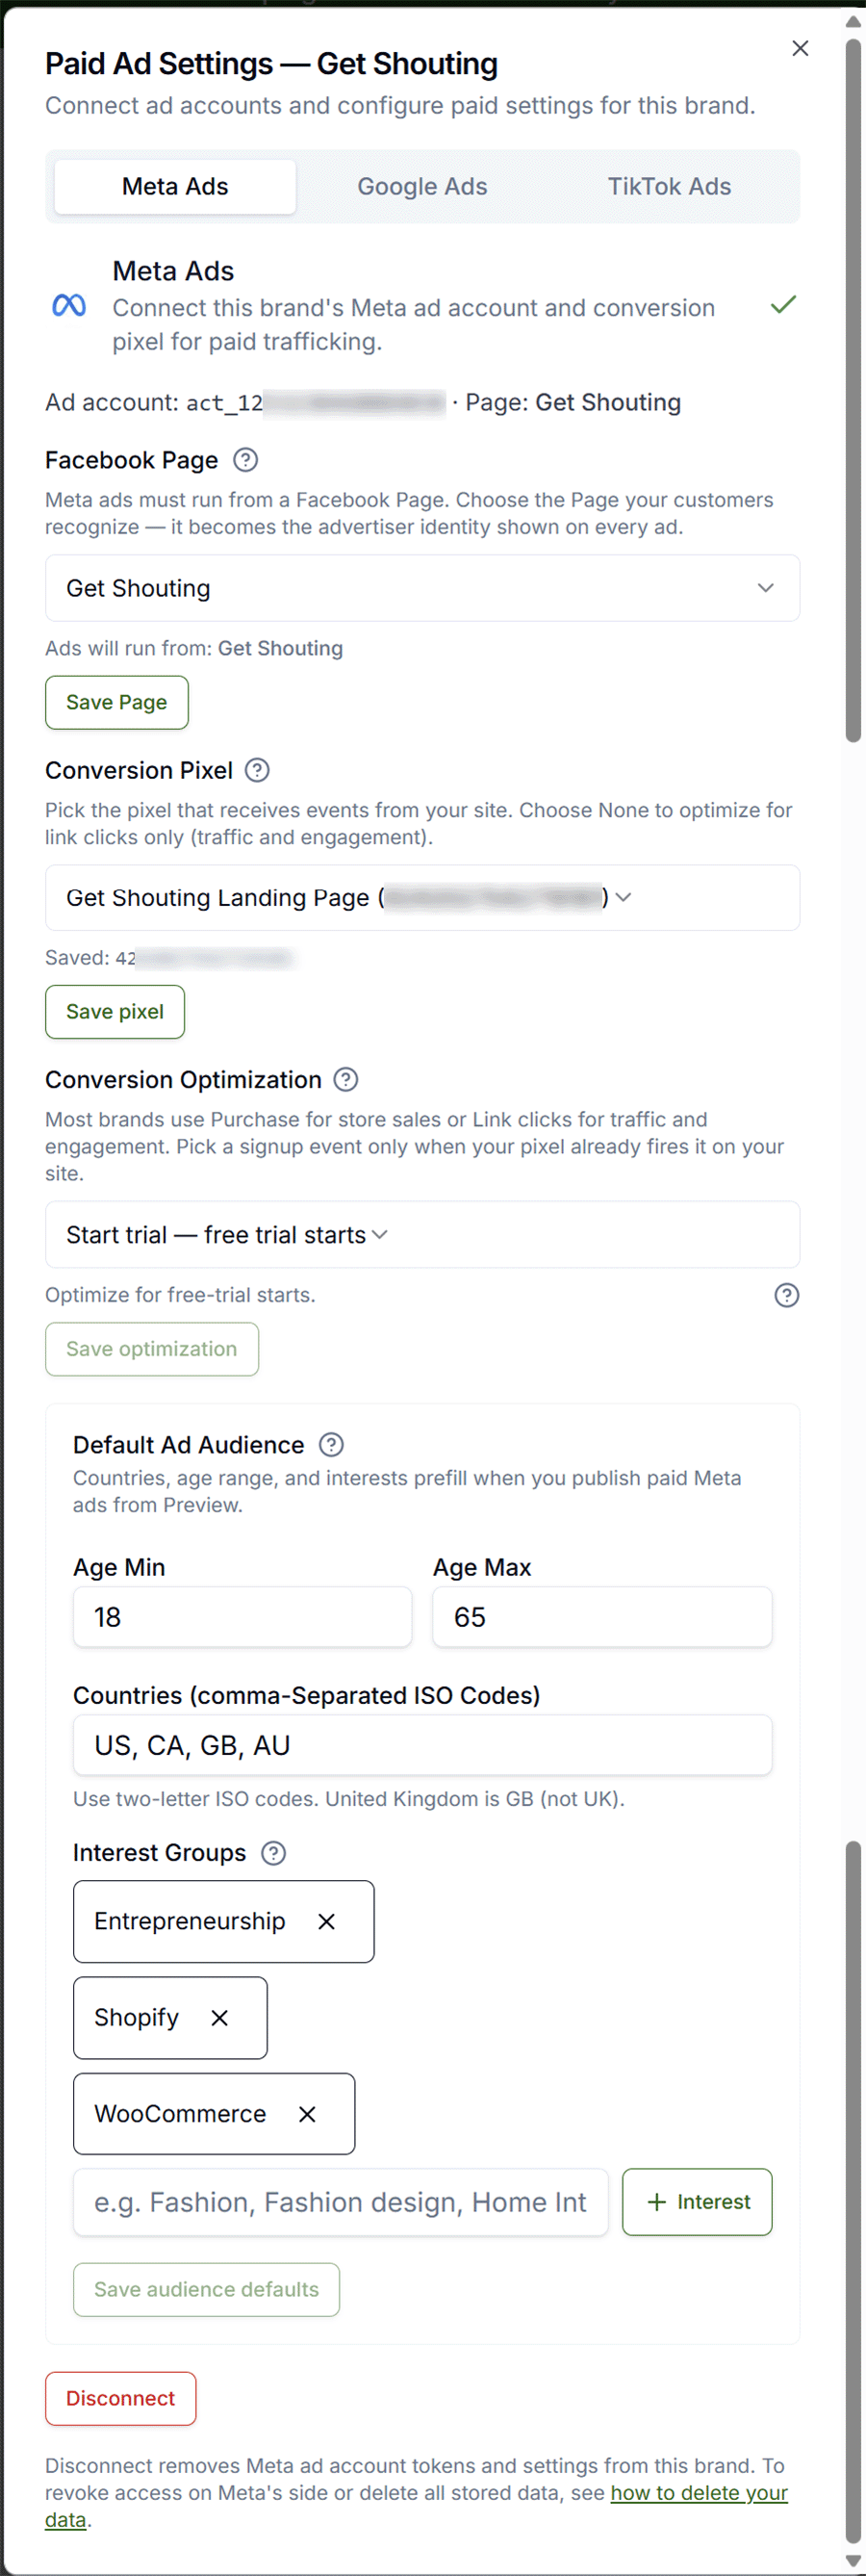
Get Shouting publishes paid Meta ads to Facebook and Instagram with your full designed creative. Connect once in Paid Ad Settings → Meta Ads, set conversion optimization and optional default ad audience, then publish from Campaign or Ad Preview. New to paid ads? Start with How Paid Ads Work.
Why It Matters
Meta is separate from organic Facebook or Instagram under Manage Social Accounts. Your conversion optimization choice tells Meta who to show ads to: people predicted to complete that action, not just people matching your interests.
Pick the wrong optimization event and Meta optimizes for the wrong behavior (cart-adders instead of buyers). Pick the wrong audience shape and you either starve the algorithm or waste spend on the wrong people.
Required before connecting Meta Ads
- Meta Ads Account: You must have an active Meta ad account.
- Business Manager Asset: The ad account must be assigned as an asset inside your Meta Business Manager.
- User Permissions: Your user profile needs partial or full access with the “Manage campaigns” permission enabled.
- Facebook Page Connection: If you connect a Facebook Page, the admin of that page must match the admin of the connected ad account.
- Verified Business: A fully verified business is required by Meta itself.
Plan & Setup Notes
Meta publish requires Pro or Agency. Connect under Paid Ad Settings → Meta Ads. Meta bills ad spend to your ad account; Get Shouting charges a processing fee on gross budget at publish. Install Meta Pixel on your store separately; Get Shouting selects the pixel ID but does not add code to Shopify or WooCommerce. Published campaigns start paused in Ads Manager until you activate them. Full setup: How to connect Meta Ads.
What to Do
Connect and Publish in Get Shouting
- Paid Ad Settings → Meta Ads → connect → save ad account, Facebook Page, pixel, optimization, optional default audience.
- +CREATE → Social → Create Ad or +CREATE → Campaign with Social Ads → check Publish to Meta Ads (paid).
- Set gross spend and flight dates in Meta ad setup → publish → activate paused campaign in Ads Manager.
- Meta chooses placements (Feed, Stories, etc.) from your optimization and creative; Get Shouting does not expose a placement picker.
Quick Recommendations by Goal
| Your goal | Recommended optimization | Recommended audience |
|---|---|---|
| Store sales | Purchase (pixel firing Purchase on store) | Countries + age; interests optional if pixel is new, broad if pixel has purchase history |
| Leads / contact forms | Lead | Countries; add 1–2 relevant interests if account is new |
| Account signups | Complete registration | Countries + age band for your product |
| Email list growth | Subscribe | Countries; interests matching your niche |
| Free trials | Start trial | Countries; narrow interests only if trial audience is very specific |
| Low purchase volume (bridge) | Add to cart or Initiate checkout temporarily | Broader countries/age; minimal interest stacking; switch to Purchase when volume allows |
| Traffic / no pixel yet | None (link clicks only) | Countries required; interests optional for focus |
Conversion Optimization: What Each Setting Does
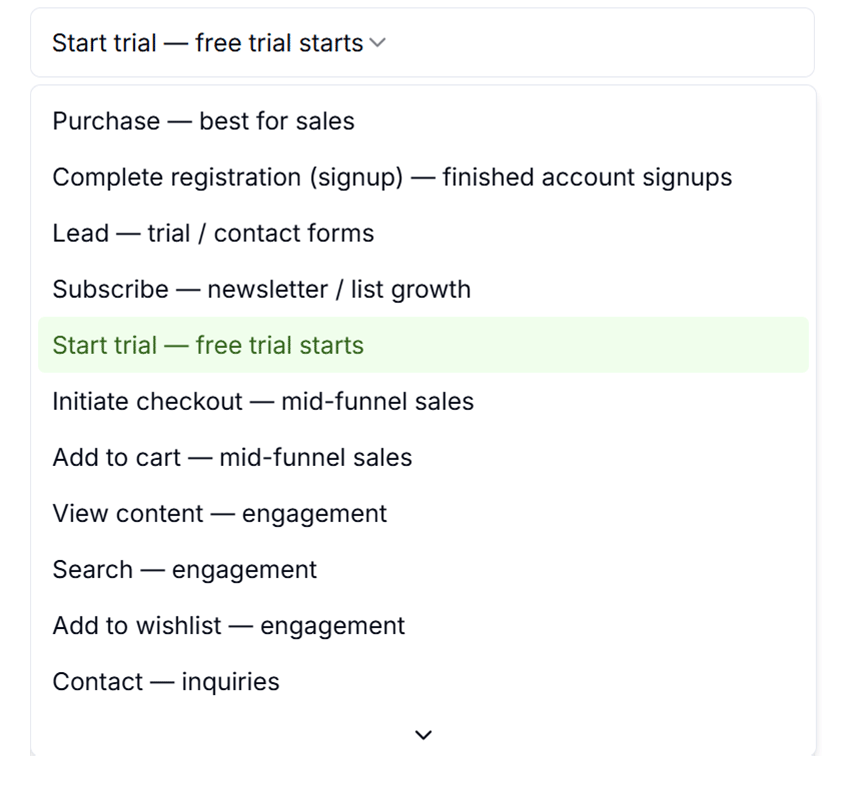
In Paid Ad Settings, conversion optimization tells Meta which action to treat as success. Meta then shows your ad to people its model predicts are most likely to take that exact action; not just people who match your interests. The event must fire on your site via Meta Pixel (Store conversion tracking), except for link clicks.
| Setting in Get Shouting | What Meta optimizes for | Choose when | Skip when |
|---|---|---|---|
| Purchase | Completed orders on your store | E-commerce sales is the goal; pixel fires Purchase events | You only want site traffic, or pixel is not installed |
| Lead | Form submissions (contact, quote, demo requests) | Lead gen is the primary conversion; pixel fires Lead on submit | You sell products checkout-style, not via forms |
| Complete registration | Finished account signups | Membership, SaaS, or community signup is the win | Signup is not your main KPI |
| Subscribe | Newsletter or list opt-ins | Growing an email list is the campaign goal | You need purchases, not list growth |
| Start trial | Free trial activations | Trial starts predict paid conversion for your offer | Trials are rare or do not correlate with revenue |
| Initiate checkout / Add to cart | Shoppers who start checkout or add items to cart | Purchase volume is too low to learn, and you accept mid-funnel signal as a bridge | You can optimize for Purchase; cart optimizes for browsers, not buyers |
| View content, Search, Add to wishlist, Contact | Product views, on-site search, saves, or contact clicks | Upper-funnel engagement or catalog awareness before you have purchase data | You have enough purchase or lead volume for a revenue-aligned event |
| None (link clicks only) | Clicks to your landing page or store | No pixel yet, or traffic/awareness is enough for this test | You have conversion tracking and want sales or leads, not just clicks |
Rule of thumb: pick the deepest funnel event your budget and pixel can support. Purchase aligns spend with revenue; Add to cart learns faster but often finds cart-abandoners. Platform reference: Meta: choose the right campaign objective.
Default Ad Audience: When to Include One
Optional default ad audience in Paid Ad Settings (age, countries, interests) prefills Meta ad setup at publish. You can still change targeting per ad.
- Always set countries you ship or sell to; this is a hard boundary Meta respects.
- Set age range when your product clearly fits an age band (or legal restrictions apply).
- Add interest groups when you are new to paid, have limited pixel history, run a niche product, or want a focused starting audience (e.g. Entrepreneurship, Shopify).
- Leave interests empty or broad when Purchase optimization is set, pixel has solid conversion history, and you want Meta’s algorithm to find buyers beyond obvious interest labels. Meta often treats interest inputs as suggestions and can expand delivery when it predicts conversions elsewhere.
- Do not over-narrow on a small budget; too many interest filters can shrink the pool before the algorithm learns.
Also see: Google Ads · TikTok Ads · Connect Meta Ads.
Optimize After Launch
- Analyze → Paid Social: spend, impressions, clicks, conversions, ROAS (syncs within ~24 hours).
- Campaigns → Paid Social → Manage Live Ads: pause/resume, flight dates, gross budget.
- Campaign → Optimize tab: AI suggestions for winners, fatigue, budget reallocation (Apply or Dismiss).
- Refresh creative every 2–4 weeks when performance fatigues.
Copy / Template You Can Steal
Meta ads in Get Shouting:

Connect: Paid Ad Settings → Meta Ads (Page, pixel, optimization, audience defaults)
Publish: Ad Preview or Campaign → Publish to Meta Ads (paid) → gross spend + flight
Go live: Ads Manager (starts paused; activate)

Goal → optimization → audience:
Store sales → Purchase → countries; broad if pixel mature
Leads → Lead → countries + niche interests if new
Traffic → None (link clicks) → countries only
Low purchase data → Add to cart (bridge) → broad; switch to Purchase ASAP

Rule: deepest event pixel supports. Cart = browsers, Purchase = buyers.
Do It in Get Shouting
Step-by-step: Connect Meta Ads, Create an Ad, Manage Live Ads.
- Install Meta Pixel on your store and confirm Purchase (or your goal event) fires in Events Manager.
- Open Paid Ad Settings → Meta Ads → save Page, pixel, conversion optimization, and default audience (countries at minimum).
- Build an ad → Publish to Meta Ads (paid) → set gross spend and flight dates.
- Open Ads Manager → activate the paused campaign.
- After ~24 hours, check Analyze → Paid Social.
Keep in Mind
- Organic ≠ paid: Instagram or Facebook under Manage Social Accounts does not connect Meta Ads.
- Get Shouting sends your full designed ad (overlays included) to Meta.
- Optimization event must match what your pixel fires; do not pick Purchase if Purchase never reaches Events Manager.
- Interest targeting is optional; on small budgets, over-narrowing slows learning.
Related How-To Guides
Apply Your Knowledge
Start your free trial and follow along in Get Shouting.
Start Your Free Trial TodayNo credit card required • 14-day free trial • Cancel anytime